Thursday, September 9, 2010

A soon-to-be new mother with too much time on her hands...

I have been so excited about having our first baby. As soon as I found out we were going to be having a baby I was making lists of things that I wanted to make for him. I may have been a little over-ambitious, but I have successfully made everything I wanted to make before he got here.

I wanted to put everything I made for Baby Boston in one blog post (I've posted all of this on my other blog) so that I could remember it. I also will provide the links to any tutorials I used where applicable.

The first project (and the one that took the longest to complete) was this wonderful quilt


I found this tutorial on the Moda Bake Shop and I just knew that it was the quilt I wanted to make. I decided to make it out of flannel because I wanted it to be extra snuggly. I have never quilted anything in my life before, but after watching this video I felt like I could do a stipple pattern using my machine.


Once I got all the right tools on my machine, the quilting went very quickly. I got stuck when my thread would continually break, and I was a little afraid that I wouldn't be able to get it finished before this little man made his appearance. However, with a new needle, some lubrication and a lot more patience, I was able to finish the quilt and I think it is just beautiful. I can't wait to wrap our baby in it!

When I finished this quilt, I pretty much swore off quilting...but now that it has been a few weeks, I find that I want to try quilting again...We'll see :)

The next project is some artwork for the walls in Boston's nursery. I created these animals based on a blanket that I purchased several years ago while I worked at Kohl's. I bought it knowing that I wanted to use it for my future children, and I love that I was able to use the cute animals as inspiration.


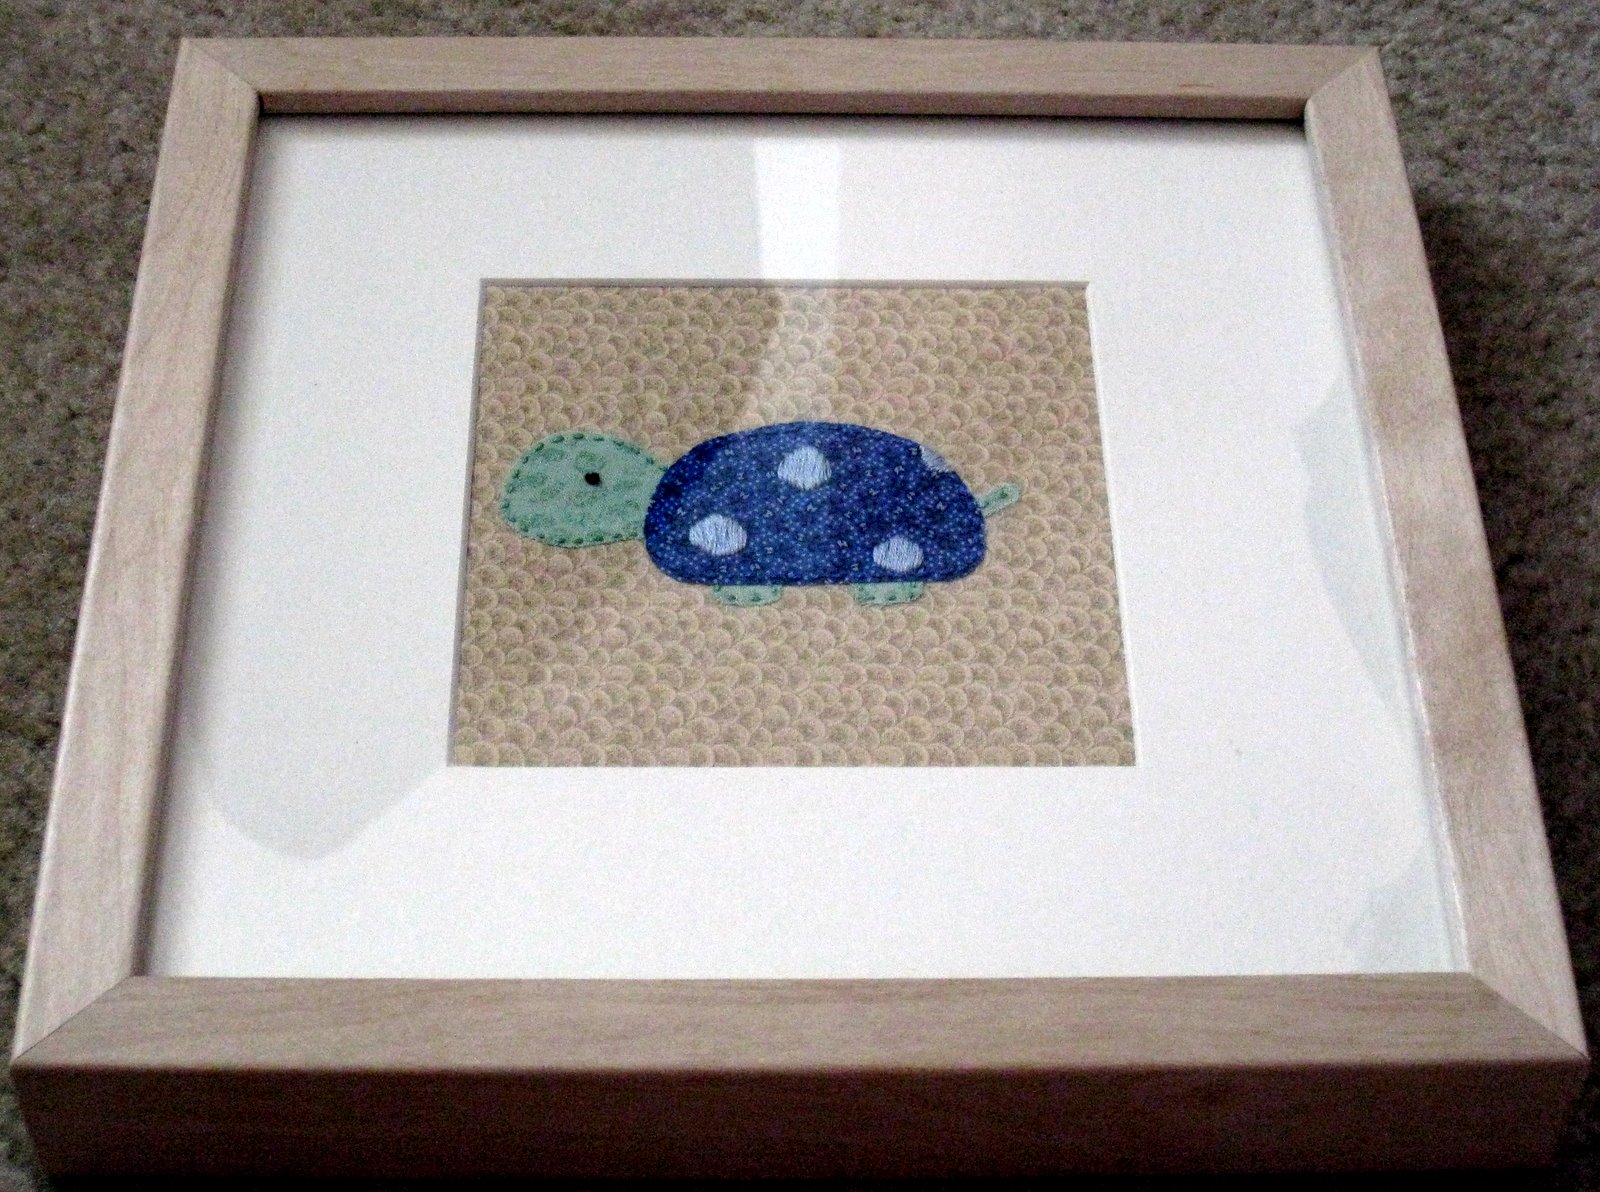
Each animal is made of fabric with stitching added using embroidery floss. I bought the frames from IKEA, and made each animal to fit. I used Wonder Under to attach each animal to the fabric backing, and then decorated them accordingly.


All three pictures lined up, waiting to be hung.

The next project is one of my favorite gifts to make for friends who are having babies.


Hooray for burp cloths! I know, it is kind of a boring craft, but I can't tell you how excited I was to make them for myself. When I first started making these I used this tutorial to learn how, but have since made my own adjustments that work for me.

This next project was inspired by this tutorial, I just wanted to make it a boy specific theme. I also wanted something that we would be able to hang on our door to announce to the world (OK, maybe just our apartment building - in case the screaming child wasn't a clue enough...) that we had welcomed our baby boy into the world.


It was super fun and easy to make - even though I had to cut out all the stars by hand. It really did not take long to make, and I love the final look.

This final project is something for which I did not use a tutorial. I decided that I wanted to make a mobile using the same animals I used for the art in Boston's room, as well as a few others from the blanket.


(I haven't officially set the animals, so the ribbon is kind of sitting funny - but I was just so excited to get them in the hoops)

Each animal is made of just the cheap-o felt you can buy at JoAnn's or Michael's. I used my sewing machine to stitch them up leaving a hole to add the stuffing and ribbon. Once they were stuffed, I finished the stitching with the machine, adding the ribbon from which they are hanging.

Here is a close-up of each animal.


(I think he is my favorite)


I found the ribbon at Michael's in the dollar bin that sits outside their front door. It could not have been more perfect! In case you can't tell, it is felt ribbon with white stitching on either side of it. I think it gives the mobile a perfect look.

That is just about everything I have made for his nursery. I have embellished a few onesies for him to wear, but didn't feel like posting pictures of each of those. In any case, I was able to get everything made that I wanted to, now we are just waiting on this baby!

Tuesday, July 13, 2010

Need to craft!

These last few weeks have been full of excitement and fun. But, it has meant that I have had little, to no time to be making anything. I finally sat down yesterday and today and gave myself a few hours to just make something - anything!

The first thing I made was this headband:


It is probably a little difficult to see in the picture but each rose is made of felt. I used a technique I have been seeing on several different craft blogs that I have wanted to try that involve cutting a circle of felt into a spiral and rolling it up. It was super easy - and I love how it turned out.

The next thing I made was this pair of earrings:


They are made of fabric rosettes and I think they turned out pretty cute. I like the rosette trend that is going on right now, and thought I ought to try it as a pair of earrings.

I also made another felt rose and added some elastic to the bottom of it to turn it into a ring. I tried it with two colors of felt, and I really like the way it turned out.


This last pair of earrings I actually made a few weeks ago:


They are one solid piece of wire and I just LOVE the way they look in my ears. They are extremely cool, and I want to make some more using some different beads. They were also pretty simple to make, which is always a bonus.

I must say I am feeling much better after taking some time out of the busy schedule over the last two weeks to make a few things. It's amazing how theraputic making things with your hands can be.

Tomorrow I plan on starting the quilting of Boston's quilt...wish me luck!
Posted by Picasa

Wednesday, June 23, 2010

Simply Charming

I have made a couple new necklace charms recently and have been overall pleased with how they have turned out:


I've seen a few "bird's nests" out there in creative jewelry land, and I really like the look. I am not necessarily thrilled with this first attempt, but I know exactly what I would change when/if I make another. I went ahead and put three eggs in there - one for me, one for Justin, and one for baby Boston who will be here before we know it!


My other new charm I made was a treble clef. This was an idea that struck me in the middle of the night, and I woke up the next morning and immediately pulled out my silver to make it. After I hammered the silver and got it into the shape of the clef, I realized the stem (the straight part in the back) wasn't going to sit the way I wanted it to without some help.

So, while I pondered how to overcome the problem, the charm sat for about 3 weeks. I finally figured out how to fix the problem, and I just love the look.

That's it for now. I think I am going to start making some more jewelry - I've definitely been missing it.
Posted by Picasa

Monday, May 10, 2010

Some new friends

I have some new friends that have stopped by and asked to be crafted with.


These sweet little ladies will be joining me as I make cards and tags and other fun and cute crafts.


Little Miss Orange has already become a super cute tag:


And the girl with her bouquet of flowers has a special gift for someone:


I'm excited to see what the other ladies have in store for me.
Posted by Picasa

Friday, April 16, 2010

Fabric Rosette Headband

UPDATE: I have a very basic tutorial here, if you are interested in knowing how I make my flowers.

I was finally able to figure out how to make the fabric roses I have been wanting to use on a headband! The finished product ended up looking like this:


Ah. Absolutely adorable! And it was SOO easy. I didn't have to do any sewing AT ALL! It was all done with hot glue as well as a fabric glue. From start to finish I think it took less than an hour and a half. I'm having to seriously restrain myself from sitting around all day making more, or going out to the fabric store and buying all sorts of cute fabric to use for the flowers.

I've made a few other headbands before I had figured out how to do this particular style. It's not to say that I don't like these headbands, they just weren't exactly what I wanted.


(mmm...don't you just love pictures taken when it is too dark? Nice and bright... :P)

I really like this headband, and apparently I have a thing for sets of three. I can't find the picture of my other headband I've made - I'll have to take a new one and post it later.

Anyway, I'm happy. I like all the headbands and I am especially happy I was able to figure out the fabric rosette.

Posted by Picasa

Friday, April 2, 2010

Scrap Material Bag

This project wasn't exactly on my list of things To Do...but I got the idea in my head and I just couldn't let it go. I actually whipped this bag up in one afternoon with some extra fabric from the mod podge vase. I am really happy with the way it turned out, even though it is quite small.


It would serve as the perfect bag for holding scriptures and a manual, but I just finished making a cute scripture case for myself. I've used it successfully as a small purse, but only when I need the very minimal amount of things. In any case I love it. I love the fabric, I love the button, I love the fact that I made a successful button hole, and I love that it has a square bottom.

Currently my sewing machine is in the shop. While I was working on another project (this one IS from my To Do list) my machine decided it had had enough and stopped working. Hopefully I will hear back from the repair shop soon. Until I do, I'll just have to work on some other important projects that need to get finished.

Posted by Picasa

Friday, March 12, 2010

Welcome Spring!

So, Spring hasn't officially started yet, I realize, but I just can't help myself. I LOVE SPRING!


Spring means Easter. This was simple enough to do. I have been wanting to fill this vase with Easter eggs for a few years (at Christmas it will be filled with Ornaments), and I finally bought some at Target. LOVE IT!

And my most recent craft to be finished:


I got this idea from something I saw over at Blue Cricket Design. I bought the frame at Goodwill, and then I painted it with the polka dots. I just used cheap $.29 sheets of felt and blanket stitched two pieces together.

I intend to change out the hangings every so often with different things. I already have some wood letters that spell out our last name I am going to decorate and will hang from the frame at some point.


Close up of the "Spring." It's hard to see, but each letter is lined with a different color of embroidery floss.


A close up of the flowers. I love each and every one of them!

HAPPY SPRING EVERYONE!
Posted by Picasa

Tuesday, March 9, 2010

To Do...


I have a long "To Do" list of craft projects that I would really like to make some headway on. I have the list posted on my desk in the craft room, but clearly it's not doing anything to get things done. Maybe if I put it out on the web, it will make me feel more responsible for getting things checked off? We'll see.

As I get things completed I'll be checking them off my list. (These are in no particular order)
  • Finish my scripture case (Completed 3/9)
  • Make a calendar
  • Finish my Sisters' birthday presents (Completed 6/19)
  • Finish the pillow (Completed 3/11)
  • Fix blue purse (Completed 3/9)
  • Complete Rag Quilt (Completed 5/5)
  • Make hangings for Welcome Frame (Completed 3/12)

These may not make sense to everyone, but I am excited to get these things finished. I'll have pictures of everything as I finish. I should mention that each of these items on my list have been started and most are near the stage of completion, I just have a bad habit of never quite finishing things.

Once I finish these I should be able to move on to some other crafts that have been stewing in the back of my mind for some time, yet I've not quite had the chance to get them started.

Friday, February 19, 2010

A much needed gift

One of my very best friends from High School recently had her home burglarized. Thankfully they were not home at the time, and some of their more precious items were not taken. However, one thing that was taken was all of her jewelry. She only had the pair of earrings she had been wearing and a necklace that was in a different place of the home at the time.

As I was talking to her about the whole ordeal, I decided that I wanted to make her some earrings to replace the ones she had lost. I ended up making 7 pairs. Probably more than she was expecting, but I got excited at making a whole bunch of earrings for a good friend. Most of these are similar repeats to some I've made in the past, but this first pair is something new.


I really like the way they turned out. I want to make another pair for myself to see if I can't tweak them just a little. They are really cool, though.


More birds. I made a pair for myself out of green birds, but I think the white ones are super cute.


I've made a few pairs of earrings like these, and I just really like them.


And again, another pair similar to what I've made in the past, but I tried something different this time, and really liked how they turned out.


It seems like most of what I post is either earrings or cards. You can tell what I like to make, obviously.
Posted by Picasa

Monday, February 15, 2010

New scarf

I found this tutorial over at Make it and Love it, and guess what?? I LOVE IT!

I have a whole bunch of extra flannel that I inherited from a friend in Arizona and I mostly use it to make burp cloths for friends who have babies. But, when I saw this project I was excited to be able to use some of it for myself! I also liked the idea of using two different color flannels for it, and I just love the way it turned out.


Cute and comfy! A perfect winter scarf.

Posted by Picasa